
evolute. blog
behind the scenes


October 13, 2015 at 16:34
filed under EvoluteTools
Greetings!
It’s been a while since we updated the blog, but some change is coming. We are currently brewing a lot of new exciting features that you will hear about very soon!
Today, we are first introducing two new functionalities that will be included in the next EvoluteTools PRO release. Let’s get down to the details.
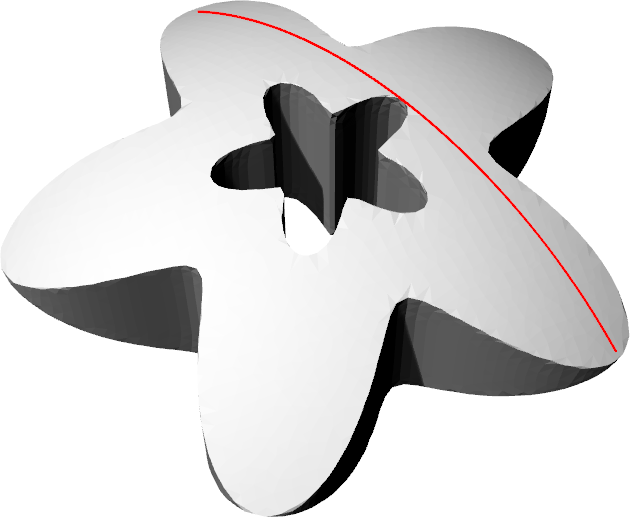
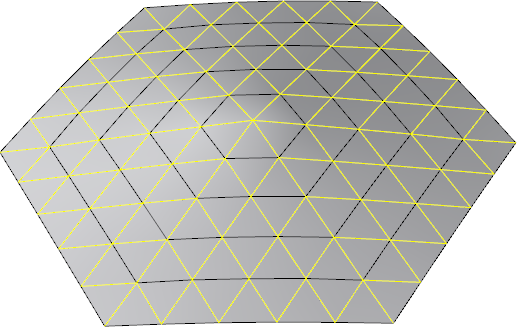
The new etMeshGeodesic command adds a feature that was long overdue : exact geodesic curves on meshes! Among the curves drawn on a surface, geodesics are those that follow the straightest path. Given two points on a surface, the shortest curve between those points is always a geodesic. On a flat surface, geodesic curves are straight lines, while on a sphere they are the great circles.
Our new command allows you to pick any two points on a given mesh and computes a geodesic curve between them. The points can be picked anywhere on the mesh, including vertices but also inner points picked within mesh faces. Check out a few examples below!

EvoluteTools PRO has long had the ability to optimize the edges of a mesh towards a unique length. At best, this optimization option will result in a mesh where all edges have the exact same length. Most of the time this configuration is impossible, in which case the optimization will simply make the edge lengths as uniform as possible.
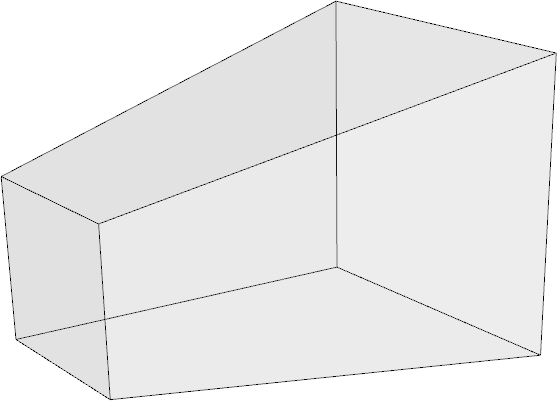
The next EvoluteTools PRO release will extend this functionality. The etSetEdgeLengthOptimization command will now allow users to assign each edge of a mesh to a specific group, according to their desired length. For each group, a specific length can be picked or it can be left to the optimization process to determine the ideal length. Finally, when all edges to be optimized are assigned a group, the user can set a weight to the edge length optimization using etOptionsImportance and then launch our classic etOptimize command. See below a simple example. Starting from a cube with all edges of length=1, the user manually creates three groups of edges assigning different desired lengths to them (from left to right respectively length=1, length=2 and length=3). After optimization, the resulting mesh verifies the length constraints (bottom).
A wide range of specific results can be obtained through manual assignment of edges. However, when the goal is simply to limit the number of unique edges in a given mesh, one might want a faster, automatic way to assign all edges at once to different groups. The new etEdgeLengthClustering command is the tool to do it.
When using etEdgeLengthClustering, the user can specify a number of groups (“clusters”) and optimally spread all the edges of the mesh according to their length. If the number of clusters isn’t specified, the command will automatically find if the edges can already be grouped in a single cluster (up to document tolerance). After using etEdgeLengthClustering, one can look at the created groups using etSetEdgeLengthOptimization, and eventually do manual changes to the groups. Again, the edges are then ready for optimization with etOptimize.
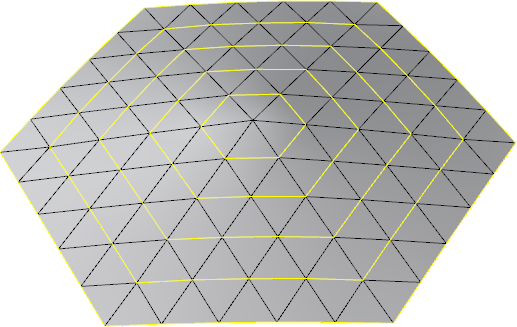
In the below example, the edges are spread in two different clusters using etEdgeLengthClustering. Then with etSetEdgeLengthOptimization we can check these groups and assign them different lengths (left, length=1 and center, length=0.7). Then the mesh is optimized using a big weight for the edge length option (right, after optimization).
Find out more about EvoluteTools LITE / PRO here.
Best,
The Evolute Team


no comments
RSS / trackback